Friday, February 1, 2008

2 X 4 (More or Less)


The Project: Our first project in Design Studio and we got to play in the wood shop! Very cool.
We each took an 18" length of 2 X 4 (actually 1 1/2" X 3 1/2") made of construction grade pine and designed and made a self-supporting system from it. We were challenged to use all the lumber leaving only a bit of sawdust as waste. Further, all joinery had to be done without use of screws, nails, or adhesives.

My approach: I started by making a bunch of sketches. Then I googled key words and phrases such as "system", "2 X 4 furniture", "2 X 4 sculpture", "arches" and several others to fuel my brainstorming. I knew pretty quickly that I wanted to take this rectangular prism chunk of wood and turn it into curves.

One early thought was to cut small pieces, about 3 to 4 inches by 2 inches by 1/8 inch and curl them up on the ends and stack them like a Christmas tree. (See sketch below.) But the wood is pretty brittle and shredded along the grain and broke against the grain so on to the next idea. (I still like this idea and I may get some fir or oak and give it a try.)

I sketched a lot of ideas, but it wasn't until I started playing with the wood and table saw that I decided on the final plan. Below are sketches of most of my discarded ideas.


I told my better, sweeter half about wanting curves and he told me about curfing--cutting small notches in the wood at intervals which effectively gives a thinner, more bendable piece while maintaining a fair amount of strength.


Gary made a piece for me with lovely, even notches, and then I had a go at it. Using a miter jig and the table saw I created one very snaggle-toothed piece. I finally got a respectable looking curf after about 4 tries. Then came the bending. About 16+ tries later only one piece survived the double processes of curfing and bending. (I think I used up an entire tree's worth of lumber during this project! So much for my commitment to sustainability!)
At any rate due to the time I spent perfecting the curf, the design of the project got short shrift and it's pretty clear I plopped an arch on top of a piece of 2 X 4. So for me this was more an exercise in working on a particular woodworking skill, rather than composing a harmonious, composed design.

Steps in construction: I cut a 1/4" piece from the long side of the 2x4 for the curfed arch. Then I cut 3" off the length. About 1/2' from each end a cut a dado sized to hold a 1 1/2" piece (made from the 3" piece). I used a band saw to cut notches in the 1 1/2" pieces to secure the ends of the arch.


Thoughts on the project: Surprisingly challenging to use a 2x4 completely! My favorite projects were the ones that obliterated any notion that the designed object started as a humble chunk of pine. (Kurt's and Ben's and Liz' come to mind.) It was great fun playing with power tools. The project helped me develop a bit more confidence in woodworking--I plan to do a lot more!

Monday, January 21, 2008

IAR 112 Contour of Closet and Figures in Perspective 01-21-08

Our first drawing assignment was a contour drawing of an open closet. Below is our very homemade cubby for clothes.

Ooops! Blogger won't load so I'll try again later.

We were also asked to create an image using figures cut from magazines that gave the impression of figures on an infinite plane. Here's mine.

Once again--Blogger problems. I'll try again later.

Monday, December 10, 2007

Leaf Drawings 110

This is our final project for IAR 110. I enjoyed playing with views of the leaf and various drawing and shading techniques. The drawing on the left side of the second row is a close up of the vein structure--just in case anyone was wondering!
Oops! Blogger STILL won't upload the dang thing. I'll try again later.

Saturday, December 8, 2007

Sustainability

Sustainability implies equilibrium in a system. A system can be a simple chemical reaction, an old growth forest, or our solar system. The inputs and outflows need to balance (be in equilibrium) in order to maintain the conditions that allow survival of the system. Equilibrium can be destroyed by too much or too little. For example, lack of food will eventually result in death for any plant or animal. On the other hand, too much CO2 in the Earth's atmosphere threatens to change climate in ways that threaten multiple species and ecosystems. The acceptance (finally!) of global warming, and to a lesser extent the acknowledgement of the political and environmental dangers of oil dependency, have led to the realization that we must think about sustainability in personal, economic, and political decisions.
It is important to look at the big picture of resource use, rather simply jumping into "green" trend. Designers will take on roles as educators and advocates in the implementation of sustainable design in built environments.
(For this entry the terms sustainable, green, eco-friendly, and such will be used interchangeably.)
Many magazines, both design and general publications, have articles pertaining to green design, green living, and green products. Natural Home, Innovative Home, and Dwell are examples of publications that focus mostly on how to make individual homes and neighborhoods eco-friendly. Natural Home covers remodels and new buildings which use sustainable design, as well as some articles on energy efficiency and living off the grid. It features many organic and sustainably produced products, from linens to flooring. Gardening articles and recipes are included in some issues.
Dwell's emphasis is on prefabricated homes, both urban and rural. The homes are generally sleek, modern structures. Most have multiple sustainable features, and most are relatively modest in size. However, these are mostly very expensive homes for early adopters of new technologies.
Innovative Home has recently changed its focus to "green building and modern design". While it is geared to the individual home and neighborhoods, it is a bit more technical than Dwell or Natural Home. The current issue has an article on transmaterials (see my entry, "2 + 1 Technologies"). Each of these three magazines is written for readers who have some basic knowledge about sustainability. Many general/home/women's interest magazines such as Better Homes and Gardens and Family Circle feature articles with more elementary information--such as recycling, using cloth bags at the grocery store, and sealing drafts from windows and doors. For all of these magazines, sustainability is a more or less personal issue limited to your house, your neighborhood.
Solar Today concentrates on solar technologies, as well as issues like water use and transportation. Most of the focus is on the use of solar design for buildings. A recent issue defines sustainability. "Buildings that address energy and environmental ... factors, we dubbed sustainable design" because they "lessen our impact on the environment".
An article in this month's popular science magazine, Discover, discusses a new prefabricated house. It is part of an exposition in San Francisco, called West Coast Green. It is the first fully manufactured iteration of Michael Kaufmann's mkLotus house. Besides using all sustainable materials, the home has a "living roof". Off site construction reduces waste by 75%, and its small, 700 sq. ft. size makes for a small carbon footprint. With a BIG cost! $294.00 which, according to the article is double the square foot cost of 93% of all new homes in the U.S.
This is an example of the downside of sustainable design. There is a perception that it is only for the rich, and that has been a mostly accurate assessment until now.
This month's UTNE Reader includes an article on sustainable design that is affordable, even in low income housing. It also has a piece on one of the pitfalls of the trendiness of "green" everything. Mick Dalrymple, creator of the PBS TV show, Build It Green, discussed the idea that living in a way that will support the health of ourselves and the planed is not about buying lots of green stuff. He argues that we must look at whole systems. That means sighting buildings to take advantage of daylight, breezes, opportunities for passive solar. And we have to take in to consideration the size of our homes. A McMansion full of sustainable products is no environmental bargain.
Plenty Magazine moves from the local scene of Natural Home, et al, and gets global. Topics in the current issue include: eco-friendly banks (who knew!), an interview with Amory Lovins on the national and global advantages of energy and resource efficiency, transportation systems, food, and wind technology. A cover story is "Function Over Form", a conversation with solar pioneer Travis Price. Price is a critic of LEEDS. Although he sees some advantages, he desires and architecture that it more than a "checklist" of insulation thicknesses and such. He thinks LEEDS makes for engineering, not architecture. He also thinks it crushes free trade and innovative thinking. For example, it galls him that architects must buy local or regional products. He says, "You can't impede bringing in Plybo0 (a sustainable, hardwood flooring) from China because it's not local. That's hippie-dippie talk." He sees two real environmental problems: suburban sprawl and the export of the American way of life to countries like China and India. He wants an architecture that arises from our deep connection to the natural world, an "architecture of the spirit" which incorporates stillness, movement, and nature. All in all he wants not just checklist sustainability, but a philosophy of design that gives rise more organically to structures that connect us to nature.
Finally, Urbanland, from the Urban Land Institute, looks at sustainability as an issue of urban planning. The philosophy is summed up by Sim Van der Ryn, president of the Ecological Design Institute in Sausalito, CA. He proposes, "Surpassibility [as a] form of ecological design that minimizes environmentally destructive impacts by integrating itself with living processes. [emphasis mine] While green building tends to focus primarily on the energy consumption of a particular structure, ecological design extends that focus to the structure's effect on the environment."
So sustainability is the buzz word right now. It has it's roots in basic biology and the idea of systems in equilibrium. I hope the idea of sustainability is not a fad and that it will become a part of our thinking and doing. Clearly, current media use the term in ways both small (recycle your paper) to large (it is involves a global paradigm shift).

Transmaterials

Innovative Home Design (winter 2007) has a report on transmaterials. These are defined as materials that combine "technological ingenuity and artistic vision" to help us function and connect with the world in ways that are healthy, functional, and aesthetically pleasing.
Three materials that seem particularly interesting are: Reben, Power Plastic, and a Mirror Duct System for daylighting.

Reben is a wallcovering that falls somewhere between paint and wall paper. It is made of all natural materials, is nontoxic (even edible!), and is said to clean the air. The name means "alive" in German, although the product was developed by the Suzuran Corporation which is headquartered in Japan. The ingredients include: powdered Japanese washi paper which controls humidity by absorbing moisture in the summer and allowing it to evaporate in the winter; powder made from scallop shells that prevents the growth of mold and bacteria, and acts as a flame retardant; and titanium dioxide which deodoizes the air and absorbs pollution when the surface is hit with light.
The makers claim Reben is a durable material that performs better than wallpaper. It comes in a variety of textures and colors, and with integrated natural grasses. The "surface conveys a plaserlike richness."

Power Plastic

Power Plastic: This is a really interesting product that may make solar power much more attractive, economically and aesthetically, to builders and building owners. This photovoltaic technology uses lightweight, organic materials (inorganic silicone has been used in the past) to make thin films that can be layered onto a variety of plastics using relatively inexpensive, mass production processes similar to ink-jet or screen printing. The cost is low, the flexibility of the plastic allows for a variety of applications, and the films use a wider range of the light spectrum than conventional solar cells. Power Plastic can be manufactured in an array of sizes and shapes. It is one of the many nanotechnologies being developed in everything from make-up to --well-- solar energy. Konarka Technologies, Inc. produces Power Plastic. Their home office is in Lowell, MA.

Mirror Duct System for Daylighting: This product looks similar to traditional HVAC ductwork. However the inside is lined with aluminum mirrors which reflect and extend light "as much as 60 feet inside a structure". This is another product of a Japanese-based firm, Material House Company, Ltd. The technology is entirely passive, using no energy (beyond what it takes to manufacture it). It reduces the need for artificial light and for the cooling often needed as a result of heat generated by lights, thus decreasing electrical energy use and CO2 emissions.

Thursday, November 29, 2007

Time Capsule Site and Orthogonal Drawing

Maybe in the office?


Orthogonal drawings of a cube are kind of simple!

Making the Time Capsule--Full Scale


This is the first time I've constructed anything from wood. Fortunately I have a patient and skilled teacher--thanks Gary! I couldn't do it without him. He watches my every cut! Below is a log of the process of making the bench/time capsule.

Saturday November 24: For the bench sides (18" each), I needed to build the width by cutting a 12" pine board into one 52" (18 X 4) by 12" piece and 2 52" X 6" pieces. To do this I first planed the board to 3/4", and then used a jointer to get an even edge. With a straight edge I could then use the table saw to cut to width. Then we glued these pieces together to create one long board measuring 52" X 18". Once glued we used bar clamps to secure the pieces and left them to set over night. I can cut this into fourths and voila! 4 sides are ready to go. The whole process took about an hour.

Clamps hold glued pieces together

Sunday November 25:
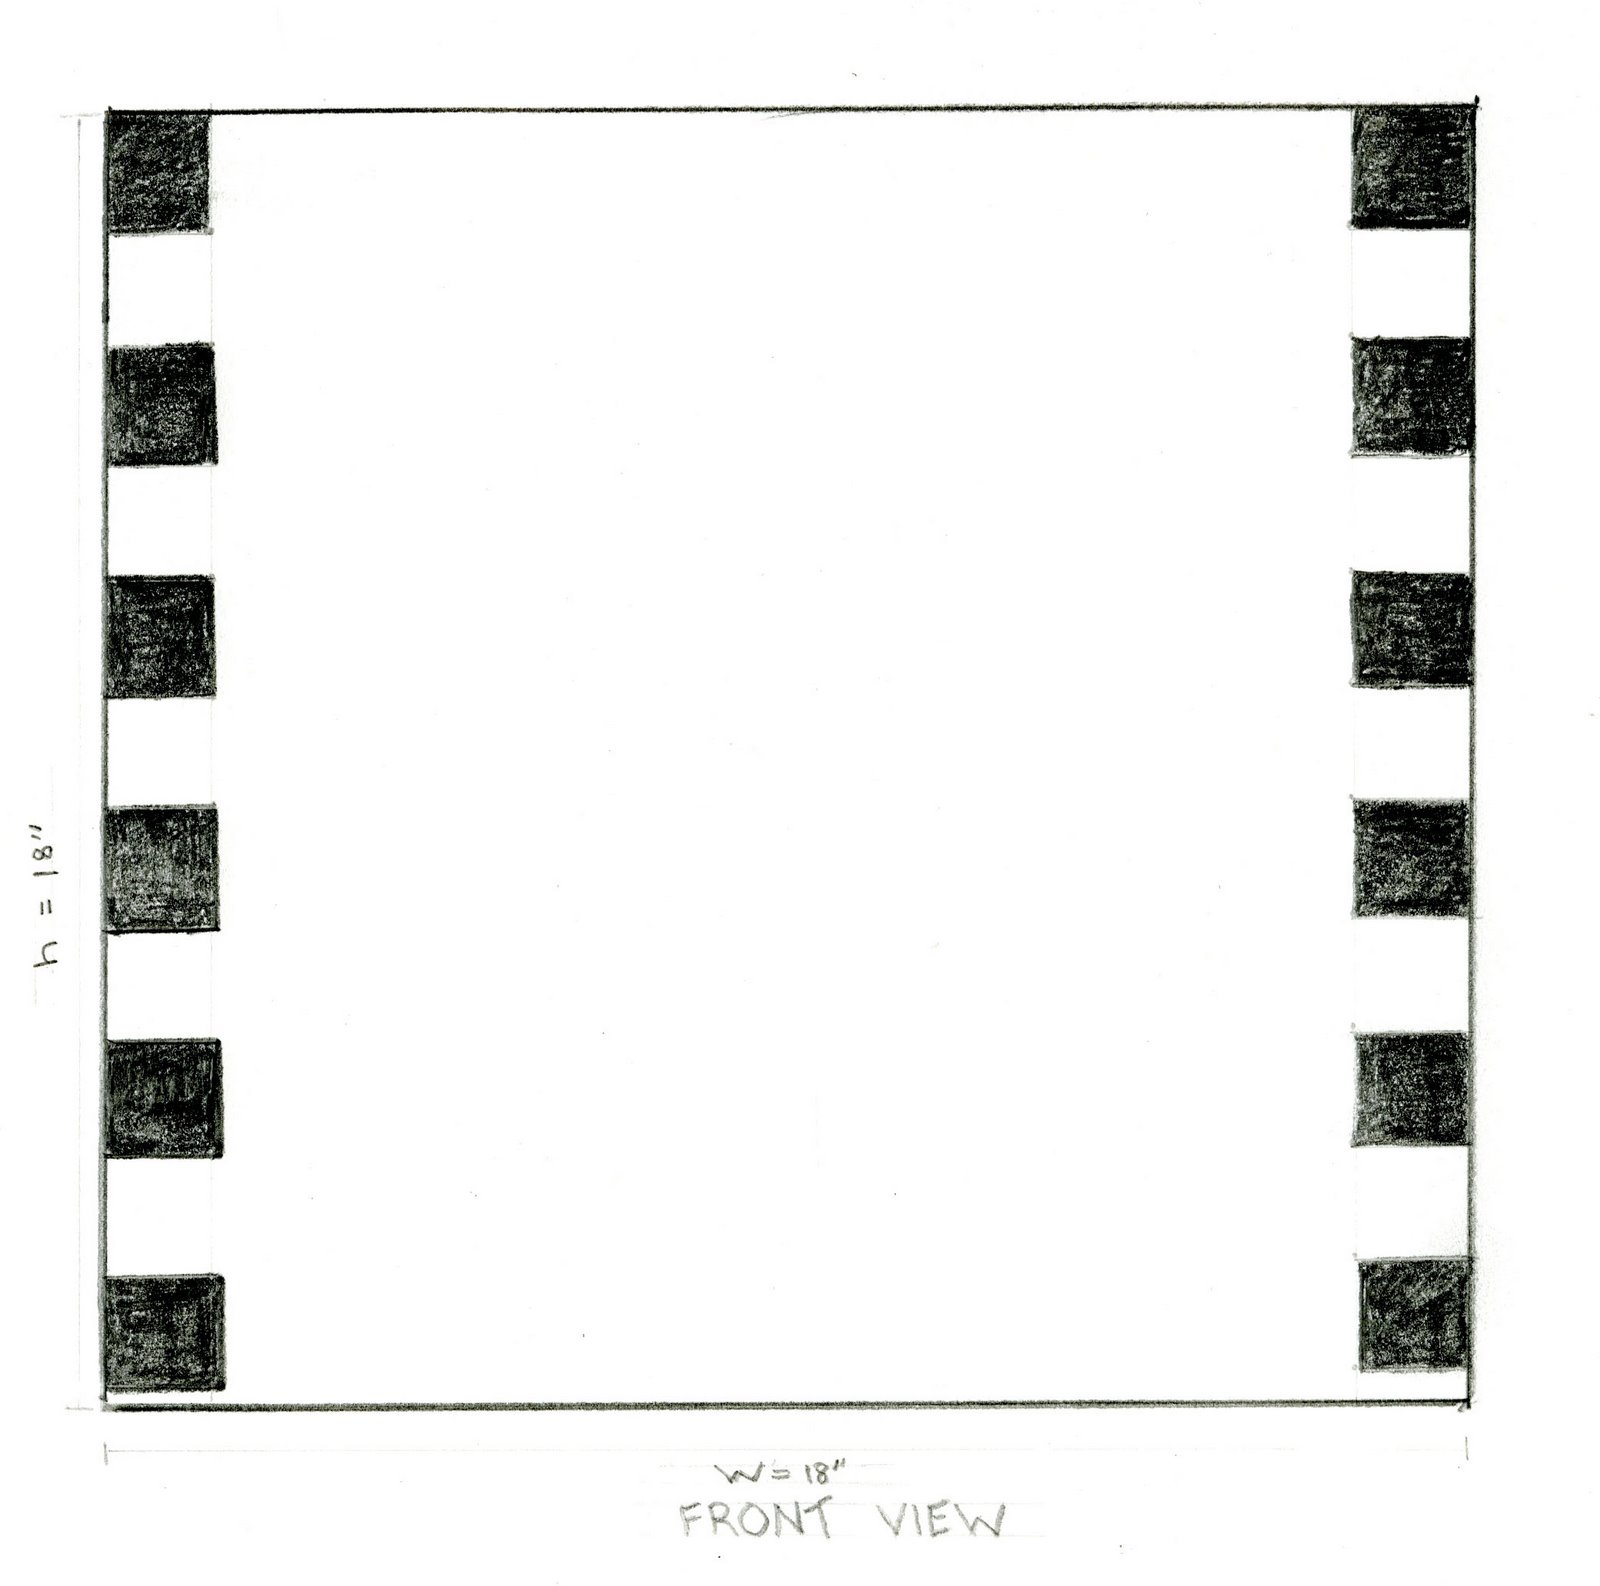
Today was the really fun, meticulous part -- making the box joints. I removed the clamps from the strips and cut them to size (4 sides at 18" X 16 1/2" each). There are all sorts of routers made specifically for box joints, but I don't have any of them! So we used Gary's table saw. We used a dado blade set at 3/4" and fashioned a jig for the miter gauge. (See pictures below.) The jig has to be made so that the joints can be cut accurately and precisely. Designing, cutting, and testing the jig and setting the proper blade height took up most of the time I worked today, but it made the actual cutting of the box joints pretty easy. The fit of the joints was a bit tight. Since glue would make it even tighter I filed down the horizontal surfaces a bit. Again thanks to Gary for helping me with all this--it was totally new to me! Besides the box joints, I also made the top and bottom panels.
The last work of the day was to cut the rabbets that will be support the interior structure of the bench.

Pieces marked for cutting box joints

Setting up the jig

Cutting the notches for the box joints


Ready to join the pieces

It's a Cube!

Tuesday November 27: Today I dry fit the box and cut off the top. Scary! It meant cutting through each of the 4 sides with the table saw--guiding a 3-dimensional cube over the saw--which was a little tricky, but it worked.
I used the band saw to cut notches in the plywood pieces for the interior and cut the top of the false bottom.

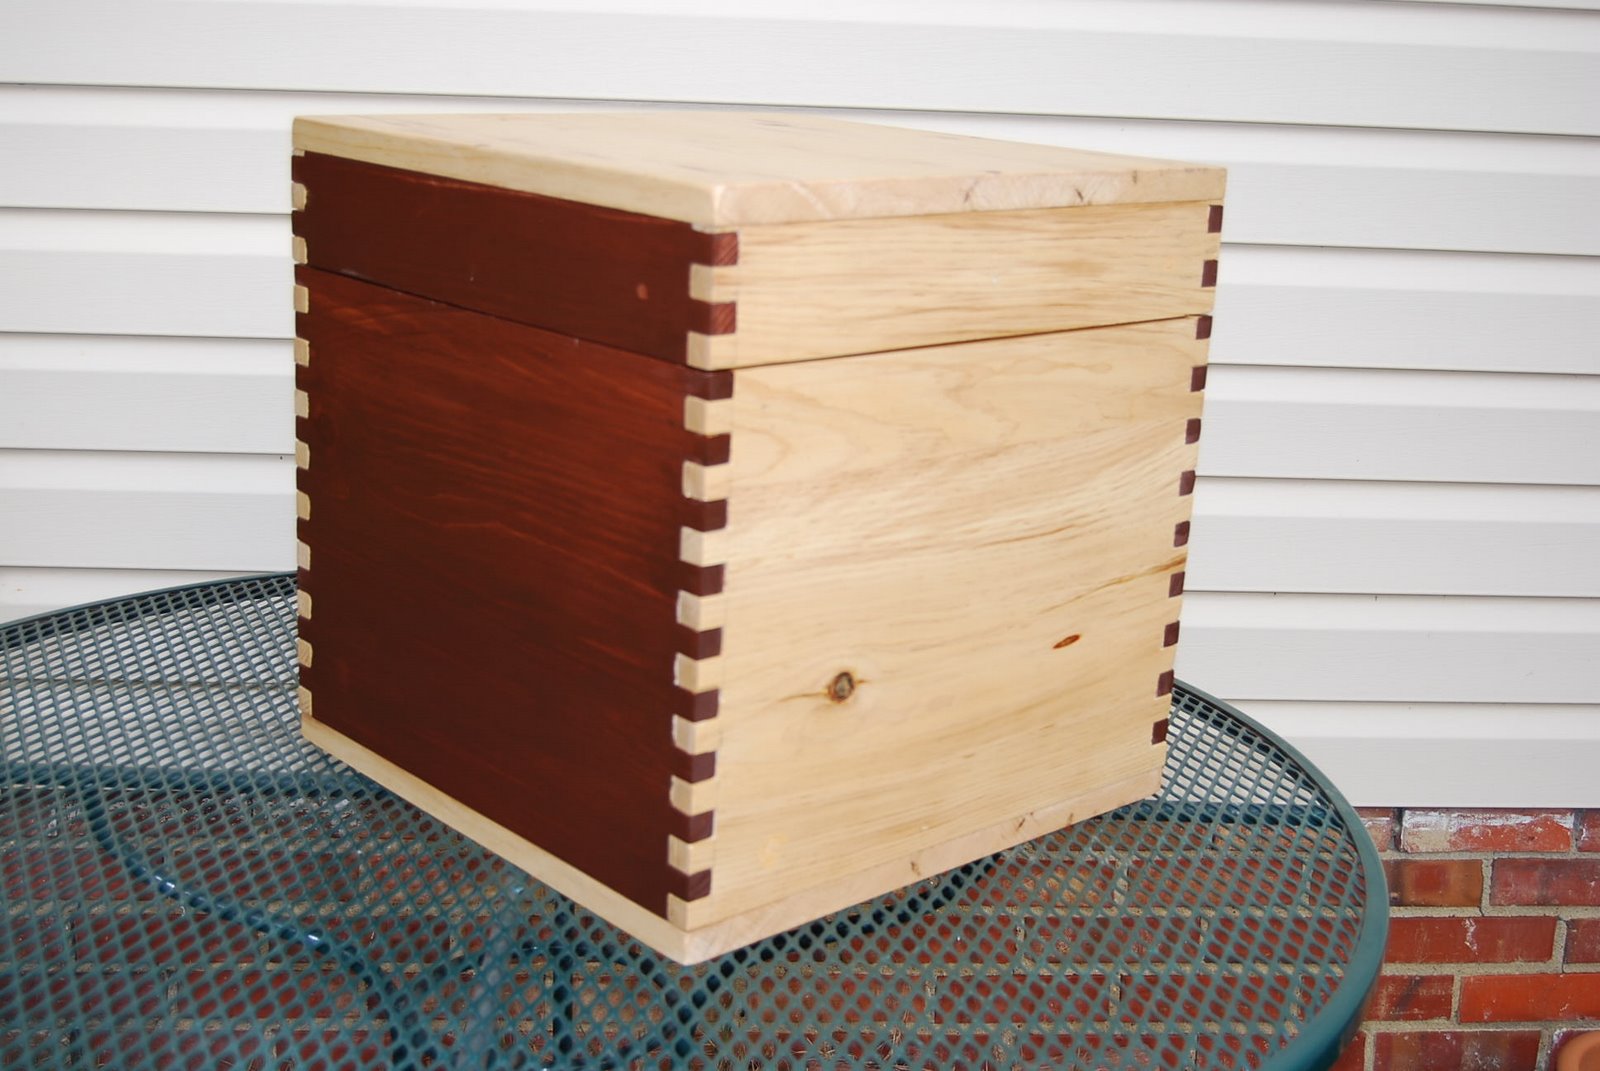
Wednesday November 28: I stained the darker sides of the box, using Minwax, water-based stain in Rosewood. It's a deep, rich brown. Then I laid on a coat of water-based polyurethane, also Minwax, on the unstained pieces. I masked the pieces I stained, but I got a bit of bleed through which I had to sand off.

A stain test. I chose Minwax water-based in Rosewood

Pieces masked for staining

Thursday November 29: Today I finished the lip on the lid. That involved planing a board to 1/2" and then fitting it to the inside of the lid. I used butt joints and fastened each piece with a flush mounted sky. I affixed the top and bottom, using sunk screws covered with bungs. The last steps were to chisel the bungs flush to the surface of the cube and then a final two coats of polyurethane (sanding with 12 0 grit between them.) And it's done!

What I've Learned: Since my concept and the structure were simple I challenged myself by making a full scale model from wood. The whole process was new to me (with the exception of sanding and staining). I learned how to make a jig and use it to make box joints. And I used a variety of power tools, hand tools, and clamps. In general, I found it much easier to get straight lines and true 90 degree corners with woodworking tools than it was when we worked with paper and fiberboard and xacto knives. I still had some mistakes, mostly at the points where edges joined. If I make a few more (which I intend to do--it's lots of fun!) I'm sure the craftsmanship would improve. Two more things: 1) power tools are not made for people who are 5' 4 3/4" tall. I had to do some awkward reaching, and 2) fleece attracts sawdust and woodchips like crazy. I'll wear a less nubby sweatshirt next time!

The completed project

The lid construction

The completed, stained box joints